


Saturday, December 24, 2011
Galaxy Cookies - A cookie recipe kids can make on their own!
0 comments Posted by SouthShore Chick at 1:15 PM
- ½ cup Butter, softened
- ¾ cup confectioners’ sugar
- 1 Tablespoon Vanilla
- Food Coloring, if desired
- 1 ½ cups Flour
- 1/8 teaspoon salt
- Dates, nuts, maraschino cherries, whoppers, mini snickers, milky way, 3musketeer sliced in to quarters.
1. In a small bowl, with a fork, combine butter, sugar, vanilla and food coloring.
2. Work in the flour and salt until dough holds together. Form it into a big ball with your hands! Yay!
3. Mold dough by tablespoonfuls around dates, nuts or pieces of candy.
4. Place cookies about 1-inch apart on ungreased baking sheet.
5. Bake 12 to 15 minutes or until set but not brown.
6. Cool; dip tops of cookies into Icing.
If desired, decorate with coconut, nuts, colored sugars and candies.
- 1 cup confectioners’ sugar
- 2 ½ tablespoons half-and-half (or 1 ½ tablespoon milk)
- 1 teaspoon vanilla
- Food coloring
Childhood Memories:
"When I was about 10 years old, my baby sis, Stephanie wanted to make cookies. She poured through our mother’s cookbooks until she found the perfect recipe, Galaxy Cookies! Momma employed all of us kids to help Steph make the cookies. The cookies were beautiful!! We tinted the dough, each cookie dipped in a different color icing, and we sprinkled each creation into brightly colored sugars. All was perfect, each cookie a picture of perfection. Until we took the first bite…
It was then that we realized that our big sis had inadvertently read the ingredients wrong. Instead of adding ¾ cup confectioners’ sugar, we added that much salt to the recipe. Mikey and I laughed, Stephanie was devastated, and our big sis was embarrassed. In the end we helped our baby sissy turn her tears into laughter.
Today, we think back on memories such as this one, and smile. It feels so good to have brothers and sisters who love each other enough to lift you up when things go wrong."

Saturday, December 17, 2011

- ½ cup butter, softened
- 1 3-ounce package cream cheese, softened
- 1 ½ cups sifted powdered sugar
- ½ teaspoon baking powder
- ¼ teaspoon salt
- 1 egg
- ½ teaspoon vanilla
- ¼ teaspoon almond extract
- 2 ¼ cups all-purpose flour
- Icing colors
- Sugar Coating Glitter
- In a large mixing bowl beat butter and cream cheese with an electric stand mixer (using flat beater attachment) on medium to high speed for 30 seconds.
- Add powdered sugar, baking powder, and salt.
- Beat until combined, scraping sides of bowl occasionally.
- Beat in egg, vanilla, and almond extract until combined.
- Beat in the flour, scraping sides of mixing bowl, until all flour is combined.
- Divide dough into 4 or 5 portions. Place each portion into its own bowl.
- Tint each bowl of dough with desired icing color (Blue, Purple, Green, Red, etc) and stir until dough is evenly colored.
- Turn dough out onto a long sheet of waxed paper, combining all shades of dough. Form dough into a log shape, wrap, and chillin refrigerator for about 1-hour, or until dough is easy to handle.
- Preheat oven to 375°, remove dough from refrigerator and unwrap from waxed paper. Because you are using waxed paper, it is not necessary to transfer to a lightly floured surface, unless you wish to use cookie cutters.
- With a Small (1-Tbsp) Scoop or melon baller, scoop portions of the dough. Roll each piece into 5-inch ropes and roll up into pinwheels. Lightly dab each rolled piece into Sugar Coating Glitter and place on ungreased cookie sheet, about 1-inch apart.
- Bake at 375° for 8 – 9 minutes. Transfer cookies to a wire rack; cool.
Wednesday, September 21, 2011

 4. Add the dry ingredients to the butter mixgture, and mix with a spoon until well combined.
Thursday, May 19, 2011

· 1 cup sugar
· 1 large egg
· 1 teaspoon vanilla extract
· 3 cups all-purpose flour
· ¼ teaspoon salt
1. Beat butter at medium speed with an electric mixer 2 minutes or until creamy.
2. Gradually add sugar, beating well.
3. Add egg and vanilla, beating well.
4. Gradually add flour and salt, beating until blended.
5. Divide dough in half, cover and chill 1 hour.
6. Roll each portion of dough to ¼-inch thickness on a lightly floured surface.
7. Cut with desired cookie cutters.
8. Place on lightly greased baking sheets.
9. Bake at 350° for 8 to 10 minutes or until edges of cookies are lightly browned.
10. Cool cookies 1 minute on baking sheets, remove to wire racks to cool completely.


 | |||
| #31 is my baby's jersey number. These were a hit at the Football Team's Team Dinner! |
Tuesday, May 10, 2011
The school year is finally coming to an end. I am going to miss all the fantastic kids who are moving up to the High School this fall. I do believe I have discovered the worst part about my job, and that is seeing all those bright smiling faces move on. :)

- No-Stick Cooking Spray
- 1 1/2 cups graham cracker crumbs
- 1/2 cup butter, melted
- 1 (14 oz.) can Sweetened Condensed Milk
- 2 cups (12 oz. pkg.) semi-sweet chocolate chips
- 1 1/3 cups flaked coconut
- 1 cup chopped nuts
2. COMBINE graham cracker crumbs and butter in small bowl. Press into bottom of prepared pan. Pour sweetened condensed milk evenly over crumb mixture. Layer evenly with chocolate chips, coconut and nuts. Press down firmly with fork.
3. BAKE 25 to 30 minutes or until lightly browned. Loosen from sides of pan while still warm; cool on wire rack. Cut into bars or diamonds.
Source: Eagle Brand
Friday, February 18, 2011
 I love collecting cookbooks. I especially love finding vintage cookbooks that are worn and tattered!
While at the Red Rooster Antique Mall last summer, the store owner helped me dig out all his cookbooks. I only purchased the ones that looked like they were loved (i.e. stained, used/abused and left with remnants of flour dust in the the creases of each delicate page.) I took home a good handful of cookbooks that day. I will only share a few of my new books so as not to bore you.
Some of these cookbooks and cook-booklets amaze me. I found one called "Sweets" which was published in 1920 that has a small handful of candy recipes as well as advertisement for it's Vegetable Compound product for women by the Lydia E. Pinkham Medicine Company. If you're interested in knowing what the heck Vegetable Compound is, CLICK HERE to be directed to Mr. John Brand's Buckaroo Leather blog. There is a complete article there that I found to be quite interesting indeed!

This lady actually "brewed" her own home remedies for ...*a-hem* "Women Complaints". I'm interested in finding out if these recipes are legitimate, and I am pleased to say that I have an entire weekend in the kitchen to try my hand at one or two of these recipes! I will use my brood of kids as my guinea pigs. They don't mind taking the responsibility of being the home chef's guinea pigs! (At least, I don't think they mind... can't say I've ever asked.)

This cookbook, "The Joy of Cooking" by Irma S. Rombauer, has definitely been through the wringer. The pages are dusted with old flour, stained with liquid ingredients and the spine looks as though it was dropped into a pot of mashed potatoes. It has definitely been loved and cherished for over 68 years!


Here's a recipe taken from one of my new vintage cookbooks:

Monday, December 6, 2010
We're busy here on the SouthShore as we begin to wrap up the Festival of Lights and roll into the Christmas groove! *Gasp* I can't keep up with the baking, and the family is trailing fast behind me eating up all the goodies before I can pipe the icing!! I baked Gingerbread Cowpoke Boots a week ago and they didn't last. Tonight I pulled out the Hershey's Kisses. I baked Peanut Butter Blossoms and... well I tested out a new cookie dough I concocted in the kitchen. I was hoping for a different taste but hey, great recipes are created by trial and error, right? What I was trying to do was recreate a clone of a recipe that my big sis had made back when I was a kid. I think I need to go at it again but this time make more of a "shortbread" type dough. Anyways, here is the recipe... The cookie reminds me of a "snowball" cookie. It's flaky and just a little dry, *grr* .....trial and error.

- 1 1/2 cups butter, softened
- 3/4 cup confectioners sugar
- 1 Tbsp pure vanilla extract
- 1/2 tsp salt
- 3 cups all-purpose flour
- 10-ounces mini chocolate chips
- 48 Hershey's Kisses
- Powdered Sugar
- Preheat oven to 375°F.
- Remove wrappers from Hershey's Kisses.
- Cream the butter, sugar, vanilla and salt in a medium mixing bowl.
- Mix in the flour 1/2 cup at a time.
- Stir in the mini chocolate chips.
- Shape dough into 1-inch balls and place on ungreased baking sheets.
- Bake for 10 - 12 minutes.
- Remove from oven and immediately press a Hershey's Kiss into center of each cookie (the cookie will crack around the edges).
- Let cool on baking sheet for about 10 minutes; remove to wire rack to cool completely.
- Sprinkle lightly with confectioners sugar for a snowy garnish!
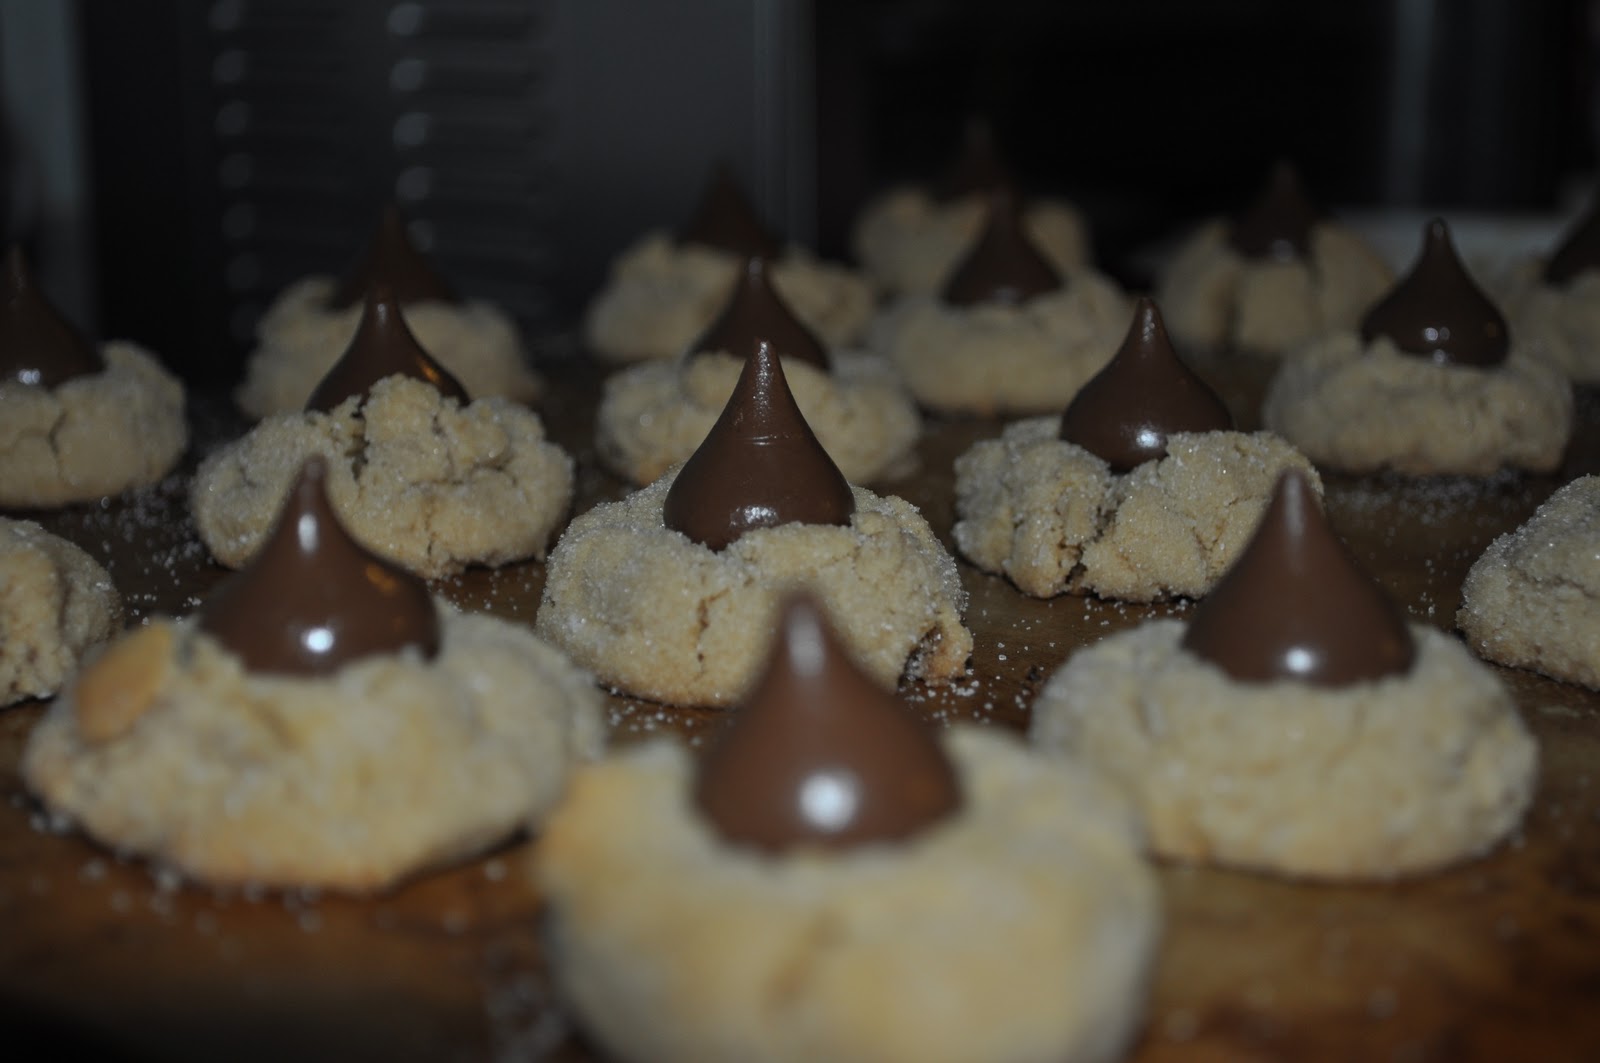
- 48 HERSHEY'S KISSES Brand Milk Chocolates
- 1/2 cup shortening
- 3/4 cup REESE'S Creamy Peanut Butter
- 1/3 cup granulated sugar
- 1/3 cup packed light brown sugar
- 1 egg
- 2 tablespoons milk
- 1 teaspoon vanilla extract
- 1-1/2 cups all-purpose flour
- 1 teaspoon baking soda
- 1/2 teaspoon salt
- Granulated sugar
- Heat oven to 375°F. Remove wrappers from chocolates.
- Beat shortening and peanut butter in large bowl until well blended. Add 1/3 cup granulated sugar and brown sugar; beat until fluffy. Add egg, milk and vanilla; beat well. Stir together flour, baking soda and salt; gradually beat into peanut butter mixture.
- Shape dough into 1-inch balls. Roll in granulated sugar; place on ungreased cookie sheet.
- Bake 8 to 10 minutes or until lightly browned. Immediately press a chocolate into center of each cookie; cookie will crack around edges. Remove from cookie sheet to wire rack. Cool completely. About 4 dozen cookies.
Happy Baking!!


